
Hiking the Laugavegur Trail in Iceland
Last August I spent 4 days hiking the Laugavegur Trail in Southwest Iceland with my partner, Don. We had both been to Iceland before, so we had a pretty good idea of what to expect — rain, wind, cold, incredible landscapes, and for everything to be very expensive. All of our expectations were accurate, but the scenery in Laugavegur was beyond what we imagined. The diversity of landscape that you can experience in a single day is incredible and unlike any other place I have been.
There are no required permits for hiking the Laugavegur Trail (as of 2018), but we did need to plan our route and reserve our bus tickets in advance. Most people hike North to South, starting in Landmannalaugar and ending in Porsmork. We wanted to tack on a day from Skogar to Porsmork and preferred ending at the Landmannalaugar hot springs, so we ended up hiking from South to North, beginning at Skogar and ending in Landmannalaugar.
We booked our bus tickets from Reykjavik to Skogar for the same day that we arrived in Iceland. Luckily there were no flight delays and we were able to skip into town, store a bag of clean clothes at the hostel we had booked for our return to Reykjavik, purchase some eggs, and track down gas for our pocket stove. (We ended up finding a few cans of leftover gas at the hostel. Thanks to whomever left those!) We brought most of our food with us from the States (dehydrated meals, dried fruit, peanut butter, chocolate, and salty snacks).
Skogar to Porsmork
The 25 km/15 mile hike from Skogar to Porsmork, also known as the Fimmvorouhals Route, was challenging but stunning. We hiked past waterfalls, over glaciers, and ended up in a lush green valley — all in a single day! It was a long day, but we were so glad that we extended the trek to include that section.
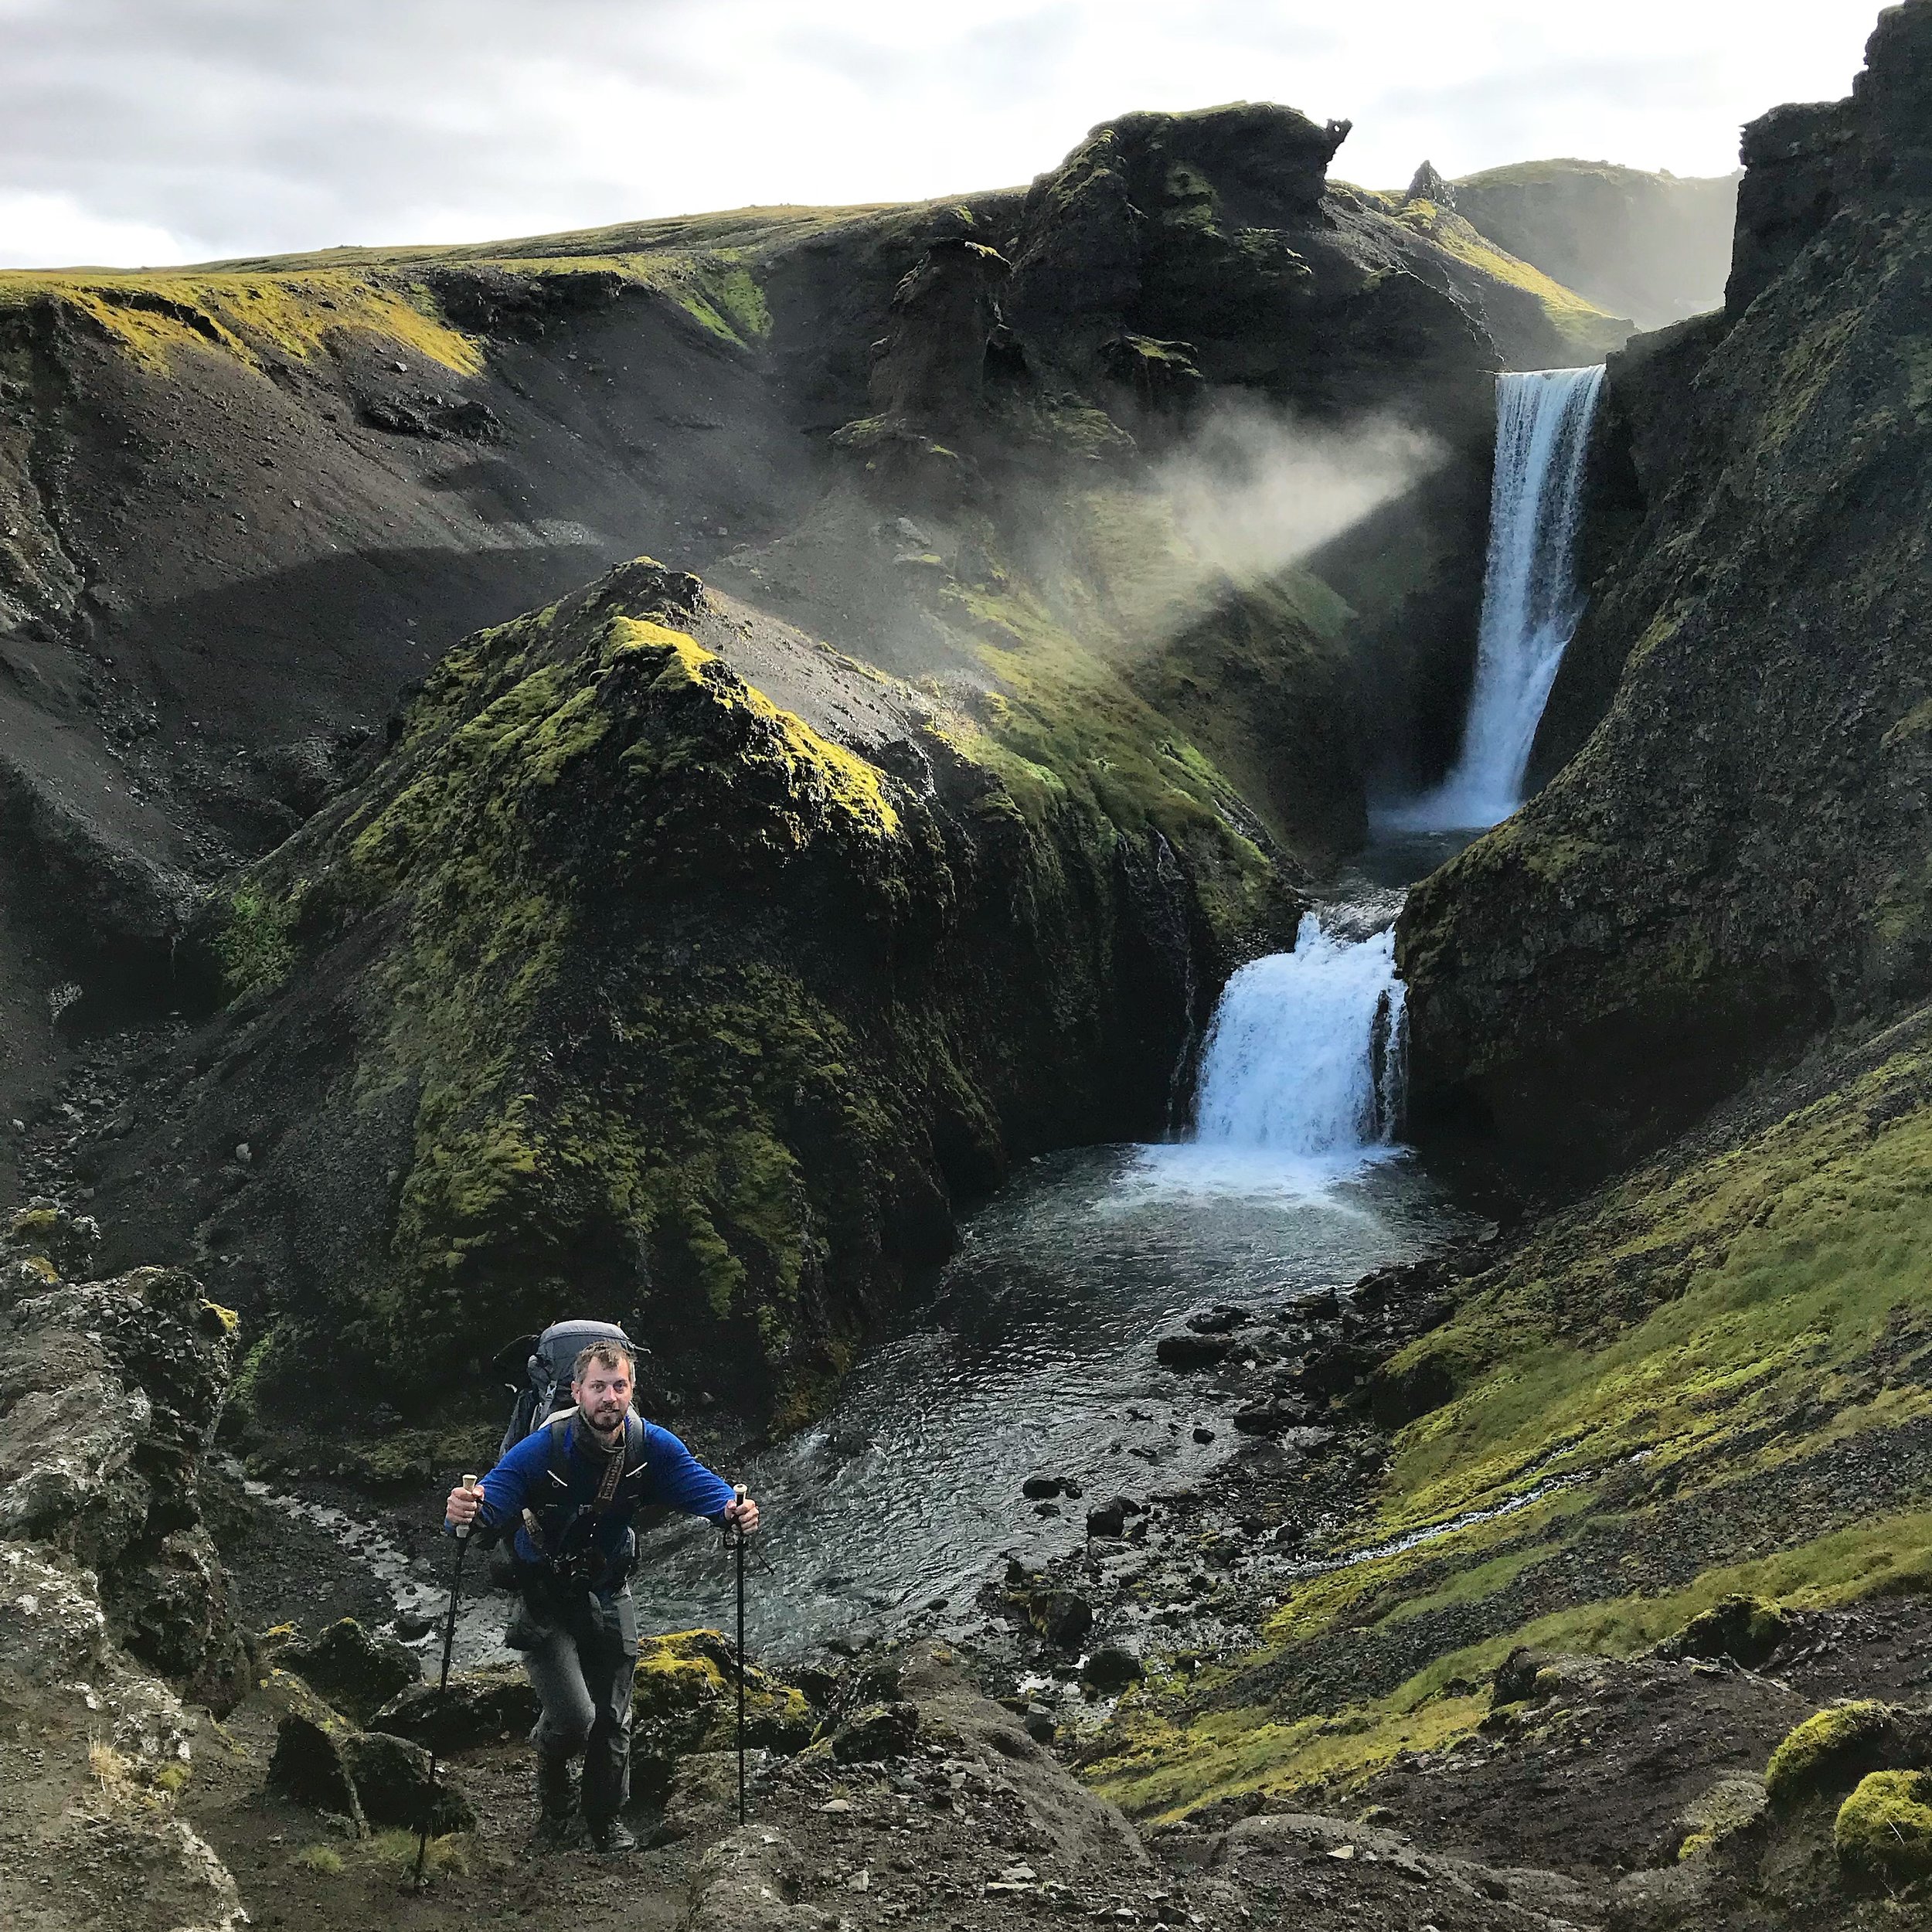
Waterfall near Skogarfoss

Glacier Crossing on the Fimmvorouhals Route

There are mountain huts along the Laugavegur Trail where you can cook and use the facilities, or pay for a bed and hot shower. If you plan to stay in huts, you should book in advance. We planned to camp and for the most part were totally comfortable sleeping outside in our 2 person tent. On arrival at Porsmork we set up our tent to find that the window had fallen off sometime the night before / that morning. Luckily, we noticed the piece of plastic on the ground as we were packing up that morning, and I stuffed it into our empty bag of pad thai turned trash bag (thinking it was someone else’s garbage). Also, luckily I came prepared with a needle and some thread (thanks Girl Scouts!).


I took advantage of the facilities available at Porsmork and enjoyed a 3 minute hot shower for $5. Since Porsmork can be reached by bus or 4 x 4 it has more facilities than any of the other mountain huts. There was even an indoor area with picnic tables where we would cook, eat, and hang out with other hikers. We both agreed that if we were to return we might spend more time exploring Porsmork.
Porsmork to Emstrur
From Porsmork we hiked 16 km / 10 miles to Emstrur. We took our time, stopping to admire the views along the valley. We had our first river crossing this day. I was not a believer in the necessity of trekking poles until this trip. Fortunately, Don got a nice pair of super light Gossamer Gear trekking poles last year and was generous enough to share one with me. If you plan to do the Laugavegur Trail, I suggest you at least rent or borrow a pair of trekking poles. I found even just one pole was helpful when crossing the rivers (which were no deeper than my knees). We really took our time this day, in part because there were really nice views and we were pretty worn out from walking 15 miles the day before.


View on the walk from Porsmork to Emstrur, just after the first river crossing.
We arrived at Emstrur in time to grab one of the few remaining flat tent spots. Camping is restricted to the area around each mountain hut and costs 2000 ISK / 15 USD per person per night to camp. We noticed that other campers were putting rocks along the outside of their tents, so we did the same. We were glad we did because it was extremely windy that night and the rocks helped to shield us a bit and kept our tent from flying away.
Emstrur to Alftavatn
The 15 km / 9.3 mile hike from Emstrur to Alftavatn felt much easier than the previous 2 days because the elevation gain was significantly less. However, we had the worst weather of our trip on this day. We were pretty positive about it though because we had been expecting wind and rain every day. We stopped at Havanngil Hut for lunch and were disappointed to find the hut was closed for cleaning. There is another river crossing just before Havanngil and the water left my legs and feet with pins and needles, so we were wet, cold, and hungry at this point. The ranger directed us to the upstairs of a barn if we wanted to eat indoors and dry off. We obliged and hung out with some Czech travelers for a bit as we ate the rest of our peanut butter and pitas (we wished we had taken more). We decided the weather wasn’t getting much better, so we slipped back into our wet clothes and continued the remaining 4 km / 2.5 miles to Alftavatn.

Inside the barn attempting to dry out and warm up with other trekkers

Lake Alftavatn after the rain
We probably looked hilarious trying to set up our tent with the wind whipping about at 35 mph. We managed to get it set up and secured and both decided to splurge on hot showers. After our showers we retired to our tent for a few hours inside our sleeping bags. When the weather cleared up enough we decided to venture out and see what was on the menu at the teeny tiny lakeside restaurant. We were delighted to find a warm, cozy cafe with sweet treats and even full meals. We were on a pretty strict budget, but were happy to pay $12 for a can of beer just to be able to sit in a warm, dry space. We met some fellow Americans, a family of 5 with kids between 9 - 13 years old who were hiking the opposite direction. The kids seemed to be enjoying themselves, though they were all snuggled in pjs and eating chocolate muffins at that point.
The weather continued to be pretty wet and windy throughout the night, but we managed to sleep well enough since we were worn out from hiking. When we woke up though the weather had totally cleared and we got to enjoy a nice sunny breakfast by the lake.

After a leisurely breakfast and some sun which helped dry out our clothes, we headed out. It was a gentle climb for the first few miles, with a smaller river crossing. We took water sandals for the river crossings. I considered taking flip flops to save weight, but that would have been a bad idea as sometimes the river is a bit swift. I suggest a pair of water shoes or sandals that strap to your feet and have good traction on the soles. See the end of the post for a detailed packing list.
After the first few miles we came to the big climb of the day. Everyone coming down was dressed like they were going skiing and we were almost in only base layers. We weren’t quite sure what to expect at the top of the hill…


There is a long climb out from Lake Alftavatn, but a stunning view!
When we reached the top of the big climb, not only were we rewarded with this stunning view of the lake, but we also saw what lay ahead - steaming sulfur pools bubbling up from the ground, neon green algae growing on volcanic rock sprinkled with snow. It felt like we had stepped onto another planet!


We had planned to hike just to Hrafntinnusker from Lake Alftavatn 12 km / 7.5 miles, but when we arrived at Hrafntinnusker the ranger suggested we continue on to Landmannalaugar (another 7.5 miles). There are not many facilities at Hrafntinnusker and it is right on a sandy ridge which tends to get a lot of wind. We heard from other trekkers coming the opposite direction that it was not a very comfortable night’s sleep. We took everyone’s advice and continued on to Landmannalaugar.
The 15 miles this day would have been more difficult had it not been our favorite day of the trek. There is no other way to describe it than otherworldly. We hiked up and over mountains, past geysers, hot springs (too hot for swimming), and over another glacier. It was truly incredible. My dogs were barking pretty loudly by the descent into Landmannalaugar. Knowing that a hot spring was my reward helped me to persevere, and oh what a sweet reward it was!

Landmannalaugar Natural Hot Springs
After a soak in the hot springs and one more dehydrated meal, we zonked out. Our bus didn’t depart until after lunch the following afternoon, so we slept in, took another dip in the hot springs and had lunch before boarding the bus back to Reykjavik.

Our final trekking meal
What we packed
3 pair quick dry underwear
3 pair merino wool socks
2 pair gloves (one thin merino layer + a thicker ski type glove)
2 pair long underwear (1 lightweight pair + 1 merino lined tights)
1 pair fleece paints
1 pair quick dry trekking pants
Beanie/warm hat
Merino ear warmer headband
Neck Warmer
Cap/hat for sun
Rain Jacket
Rain Pants
3/4 zip merino wool top
3/4 zip fleece top
Nano puffy jacket
2 short sleeved merino wool tees + 1 long sleeved
Down sleeping bag
Sleeping Pad + Down pillow
Quick Dry Towel
Dr. Bronner’s Bar Soap
2 Nalgene Water Bottles (You can drink directly from the streams in Iceland)
Camping Meal Set (bowl, cup, spork)
Pocket Stove
Lightweight pot for boiling water for cooking
6 dehydrated dinners and 2 dehydrated breakfasts* (We were hungry and wished we had taken 8+ dinners)
Salty Snacks
2 packs trail mix
2 packs dried mango
10 Cliff Bars
Peanut Butter (8 oz.) * We wanted more
6 Eggs
10 packs oatmeal
Flatbread
Dark Chocolate
2 person tent
Chaco Sandals for river crossings
Headlamp
Don’t forget to pack out EVERYTHING you bring in!
Try to avoid going #2 outside. There are toilets at the huts.
Follow the guidelines, listen to the rangers, and tread lightly.

What we spent $
WOW Air flights $330 roundtrip pp + baggage fees
Bus to/from airport $60 pp
Roundtrip bus passes to start and from end of trail $130 pp
2 nights at hostel in Reykjavik in a private room $200 p/n
Camping x 3 nights $15 pp
Showers on trail $5 x 3
Food brought from US $90
Food in Iceland $100 pp
Total $965
Managing Money During Your Gap Year
Be frugal but don't obsess over every dollar. Don't miss out on once in a lifetime opportunities. When in situations where bargaining is culturally appropriate, bargain, but consider the significance of that amount of money to you compared to the person with whom you are bargaining.
My love of travel over the years has taught me to be smart about managing money. I made some mistakes early on (ie. not understanding exchange rates and drastically overpaying for souvenirs). Yeah, they were learning experiences, and that is part of a gap year -- you are free to make mistakes and learn from them. Another core lesson I learned from traveling: heed the advice of people who have been there before me. Hopefully some of the lessons I learned throughout my years of traveling can help you to save some money and make smart financial choices during your gap year.
Make a Budget (and stick to it!)
How much money will you need for basic necessities (food, lodging, transportation)? I have found the Lonely Planet budget suggestions (Divided by: Budget, Midrange, Top End) to be pretty accurate. Figure out which category suits your travel style, and multiply that by the number of days you plan to travel in that region. ie. $30 per day in South America will mean you can expect to stay in hostels, prepare most of your own food or eat at inexpensive local markets, and walk or take public transportation.
Keep track of your expenses and if you accidentally go over one day, expect to cut back your expenses another day to make up for it. If you have trouble sticking to your budget, try only taking enough money with you that you have allotted for that day. Store your remaining money securely in a locker in your hostel. If there is no locker, or if you are in a private room, stash your extra cash and valuables inside a backpack or bag with zippers. Lock the zippers to one another with a small combo lock.
There will undoubtedly be excursions or more costly activities you'll want to participate in during your gap year. If you can swing it, add an extra cushion to your budget for that Amazon experience or trek to Machu Picchu. Plan ahead so you don't have to miss out on a once in a lifetime opportunity. Research companies (or ask your gap year advisor for recommendations) to ensure you get good experience from your investment.
If you are already on a shoestring budget, consider looking into work or volunteer opportunities that might subsidize your housing and food costs for a portion of your gap year. Authentic encounters where you get to spend meaningful time with locals are often the most memorable parts of a gap year experience. You'll be able to save up cash that you can use for the more "touristy" parts of your gap year.

Me during a week volunteering at an elephant conservation center in Thailand
Accessing Cash
Traveling with up to $200 cash in newer bills as a back up fund is a good plan, especially if you are traveling independently. Though I do not recommend bringing all of your budget in cash. You run the risk of having it stolen, plus you will waste money on exchange fees each time you exchange USD to local currencies. No matter where you go, you will see money exchange businesses that advertise "no commission" or "no exchange fees". This is not true! Do not be deceived. Currency exchangers make money by giving you an unfavorable exchange rate. The exchange rates offered at currency exchange booths are rarely, if ever, competitive to those offered by banks when you withdraw cash from an ATM.
Bring a debit card with a chip to withdraw local currency from ATMs. Visa tends to be the most widely accepted, though MasterCard is also an option. I typically recommend participants also bring a back up credit card (Visa or MasterCard with a chip) for emergencies (or in case the debit card is lost, stolen, or does not work). Be aware of the fees that your bank charges for accessing an ATM that is not affiliated with your bank, as well as foreign transaction fees and conversion fees. These can really add up. I suggest withdrawing larger amounts (no less than the local currency equivalent of $100) to minimize the frequency of your withdraws and fees assessed by your bank.
If you plan to do a lot of traveling, or for a long period of time, you might consider opening a checking account with Charles Schwab or Fidelity. Both offer checking accounts linked to brokerage or mutual funds with free ATM withdraws worldwide.
Store your extra cash and backup credit card separate from your debit card and money you have allotted to spend for the next few days. If something is lost or stolen you will have a backup plan. Many debit and credit cards now come with access to block your cards via your online account. If you can't do this, be sure you have the account numbers and international customer service numbers noted somewhere so that you can immediately report the loss if this happens.
Ways to Stretch Your $$$
Take a re-usable water bottle (and Steripen if you won't be able to drink the tap water)
Bring your water bottle with you, always
Minimize your alcohol consumption (alcoholic beverages are often as expensive as a meal)
Travel like locals (bus, subway, bicycle, by foot) Only take taxis when necessary or for safety
Stay in hostels or locally owned guesthouses
Bring a quick dry towel and combo lock to avoid having to rent them
Eat like locals / Shop at local markets and cook your own food
Avoid touristy areas for meals (quality is usually poor and prices are inflated)
Be frugal but don't obsess over every dollar. Don't miss out on once in a lifetime opportunities. When in situations where bargaining is culturally appropriate, bargain, but consider the significance of that amount of money to you compared to the person with whom you are bargaining.
Packing for your Gap Year
The single most important piece of advice I can give on packing is to stick to the packing list. DO NOT OVERPACK. You maybe be tempted to bring more than what is suggested, but after a few days of lifting your luggage on/off trains, planes, and tuk tuks you will wish you left that extra pair of shoes at home. You will be surprised how much you can live without, and how little you care about your fashion choices during your gap year. Trust me....
You made the courageous choice to deviate from the traditional path and take a gap year before college. Awesome! Hopefully by now you have also already developed a well-rounded plan for your gap year. (If you haven't you might consider scheduling a free consultation with us to help you get started :) For those of you who already have their gap year plans sorted, you may have already begun thinking about what you will take with you. It is smart to begin strategizing how you will pack in advance in order to avoid the fatal mistake of overpacking.
Packing
The single most important piece of advice I can give on packing is to stick to the packing list. DO NOT OVERPACK. You maybe be tempted to bring more than what is suggested, but after a few days of lifting your luggage on/off trains, planes, and tuk tuks you will wish you left that extra pair of shoes at home. You will be surprised how much you can live without, and how little you care about your fashion choices during your gap year. Trust me....

Sapa, Vietnam
Traveling light is the ideal. When selecting clothing to bring, keep in mind that you may be traveling through diverse climates as the season changes, and choose clothing that is comfortable, and versatile in all situations. Plan to layer up for cooler weather. You can still appear put together and practical if you put good thought into your packing. Pack clothing that can serve multiple functions, for example, leave the sequence mini dress or silk shirt at home and bring a maxi dress or wrinkle free collared shirt that you can wear for both cultural activities and a night out. Avoid items that require ironing or special laundering.
Don't forget to be culturally sensitive with your packing choices. In some countries it is not acceptable to wear short shorts or tank tops. Pack knee-length shorts/skirt, or pair of loose fitting pants instead. You may be expected to cover your shoulders or head before entering some churches, temples, or mosques. Often times simply covering with a scarf can be modest enough to satisfy the requirement. Be sure to read up on the customs of places you plan to visit beforehand so you are prepared to be respectful of local traditions.

Blue Mosque in Istanbul, Turkey
If you are participating in an organized travel program during your gap year, the program administrators should supply you with a specific packing list for your program. I recommend following that list closely, as they know best what you will and will not need.
For those who are planning an independent gap year experience, here is a sample packing list I use for the Semester in Europe programs I lead:
Suggested Packing List
Shoes (No more than 4 pair)
◻ 1 pair of comfortable walking shoes ie. (broken in before we leave)
◻ 1 pair of business attire dress shoes
◻ 1 pair of sturdy sneakers or running shoes (optional, depending on your interests)
◻ 1 pair Flip-flops (optional but useful around hotel/hostel)
Everyday Clothes
◻ Long pants x 2 (1 pair jeans, 1 pair that can be dressed up)
◻ 1 pair of Shorts
◻ Skirt or Dress x 1-2 (Something that is comfortable and can also be dressed up)
◻ Shirt/tops x 5
◻ Warm tops for layering x 2 (cardigan and light-medium weight jacket)
◻ Socks x 4 (can easily hand wash)
◻ Underwear x 5 (can easily hand wash)
◻ Business Casual Outfit
◻ Swimsuit
◻ Raincoat
Gear
◻ Suitcase for traveling (see below)
◻ Daypack and/or messenger bag (over the shoulder strap is most secure)
◻ Water bottle (avoid using plastic bottles to save money and the environment!) ◻ Stuff Sacks and a Reusable Tote ◻ Portable Charger ◻ EU and UK electrical adaptor
◻ Small combo lock (lock the zippers of your daypack together to deter theft in your hostel)
◻ Small travel umbrella
◻ Quick Dry Towel
Accessories
◻ Sunglasses + Hat
◻ Camera & charger
◻ Ear plugs (optional)
◻ Eye shade for overnight travel (optional)
◻ Laptop or WiFi compatible device – phone
Paperwork etc
◻ *Passport
◻ Money belt pouch/belt to carry passport and money when traveling
◻ 1 Debit and 1 Credit Card
◻ Travel journal (optional)
Toiletries
◻ General toiletries (toothbrush, toothpaste, soap, shampoo (4 oz. or less), sanitary needs etc. No need to bring full sized bottles. There will be places to re-stock along the way.)
◻ Contact lenses and solution (Enough to last entire trip)
◻ Hand sanitizer (travel size)
◻ 4 oz. bottle of Dr. Bronner’s or other laundry soap (optional)
Personal first aid kit:
◻ Any prescribed medications in original bottles + copy of prescription
◻ Pain relief (Tylenol, Ibuprofen etc)
◻ Electrolyte sachets x 5
◻ Vitamin C tablets or Emergen-C packets x 10
If you plan to spend part of your gap year in a location without regular access to potable water, you will likely want to bring a UV water filter.
No matter your destination I recommend leaving Hairdryers; Hair Straighteners, Electric Razors; or Expensive Jewelry at home. If you try to use hairdryers, straighteners, or electric razors you risk breaking them and starting a fire, as the voltage is not the same in every country.
Laundry: Your program leaders will help locate laundry facilities roughly every week. In Europe these can cost $10+ per load. Bring a small bottle of multi-purpose soap, such as, Dr. Bronner’s to hand wash items in the sink.
Luggage
Most gap year experiences involve spending time away from home, either internationally or domestically. You will likely need a sturdy piece of luggage small enough to fit at least 3 months worth of gear. It is worthwhile to invest in a sturdy piece of luggage that will last you a lifetime rather than buying something just because it is cheap and risk having it fall apart mid- trip. It does not necessarily need to be brand new in order to be of good quality. REI and Patagonia both sell used gear. Do your research and read reviews of products and brands before investing in a piece of luggage.
If your gap year program offers suggestions as to what type of suitcase - backpack, duffel, or wheeled suitcase, I recommend you heed their advice. They know what sort of luggage will suit your needs best.
I use a 70 liter backpacking pack for trips where I expect to engage in rugged outdoor experiences that might require me to carry everything a significant distance over a bumpy road or across a sandy beach (Southeast Asia & Ecuador & Peru). It is nice to have a pack with a zipper that allows you to access things at the bottom of your pack without unpacking everything from the top. A rain cover will help keep your belongings dry when you encounter wet weather.
I took a duffel and a hiking day pack both times I traveled to Nepal. It is likely your bag will go on top of a bus or in the back of a truck at some point. A waterproof duffle like the Patagonia black hole is super sturdy and waterproof. We employed porters on our treks, and packed our belongings in duffles to make it easier for the porters to strap multiple bags to one another. We carried what we needed for the day in our daypacks.
For trips where I spend most of my time in cities (Semesters in Europe) I use a wheeled Osprey that also has stow-away backpack straps and detachable daypack. If you plan to travel by train I recommend your suitcase dimensions not go over 25" x 16.8" x 11.5”. Larger suitcases can be difficult to fit inside the luggage compartments on board trains.

Something to identify your luggage as uniquely yours
Wherever you are headed, remember to pack only what you really need. Your gap year is a once in a lifetime experience and you'll want to save your energy for actively engaging with the world around you, not stressing about all your stuff. Have questions, comments, or tips I left out? Leave a comment below!
Laos Travel Tips
Few people know much about Laos, or even where to locate it on a map. Laos is a landlocked country sandwiched between Thailand and Vietnam with China looming to the North and Cambodia to the south. Laos has a fascinating history with influences from the ancient Khmer empire of Cambodia, which brought Theraveda Buddhism, and Chinese linguistic influences on minority groups such as the Lanten people. Laos was colonized by the French in 1893 and their influence can still be seen in the cafes of Luang Prabang. Despite its long history of foreign interference, the remoteness of many villages has helped to preserve the unique ethnic minority traditions that make up this small yet diverse Asian nation.
Laos only became open to tourism in the 1980s, and it is now a regular stop on the Southeast Asian backpacker circuit. Laos people have traditionally used boat travel to navigate the lush tropical landscape that makes up much of the country. Taking a cruise along the mighty Mekong is one of the best ways to explore, although opportunities are becoming fewer as China builds more damns along the Mekong River. There has been a push towards developing eco-tourism, with local companies, such as Green Discovery, offering one day or multi-day kayaking, trekking, and bike tours. Many overnight treks offer a chance to see authentic village life during a homestay. As tourism in this small country of just 6.6 million people grows, opportunities for true cultural exchanges diminish. If you want to experience the real Laos don't wait, go now!
If traveling from Thailand you can cross the border via land from Chiang Khong, Thailand. You will need to get a visa on arrival which costs around $35 USD for United States citizens. Many travelers continue on to Luang Nam Tha for a jungle trek and community homestay. After exploring the northern jungles, check out the UNESCO World Heritage city of Luang Prabang. With meandering streets perched at the convergence of the Mekong and Nam Ha Rivers, Luang Prabang is the perfect spot for a luxurious vacation on a backpacker budget. The small city is smattered with beautiful Buddhist temples, French cafes, and stores selling textiles woven in traditional patterns. Luang Prabang is the destination for relaxation in Southeast Asia. After enjoying a delicious breakfast of Lao coffee and pan au chocolate at Cafe Banneton rent a bicycle and explore some of the historical temples or check out the Traditional Arts and Ethnology Center near Dara Market to learn about ethnic minorities. It is small, but well curated and the museum shop has high quality fair trade handicrafts for sale at reasonable prices. Grab lunch at Cafe Ban Vat Sene and escape the afternoon heat with a relaxing massage. Just before sunset stroll by some of the larger temples to hear the monks' rhythmic chanting. Later explore the night market, and try street food for dinner. I recommend fried dumplings and spicy noodle soup on the walking street near the post office.
Wake up early the next morning to see the procession of the alms, where local Buddhists offer food to robed monks. Please remember to be respectful by dressing modestly with shoulders and knees covered. While it may be tempting to participate, it is best to hang back and observe, taking pictures without getting too close and corrupting the ritual. Later catch a Tuk Tuk to Kuang Si waterfall, bring a picnic lunch with you. In the evening try one of the riverside restaurants for a delicious dinner of traditional Laos food, or enjoy some French fusion food at Tangor.
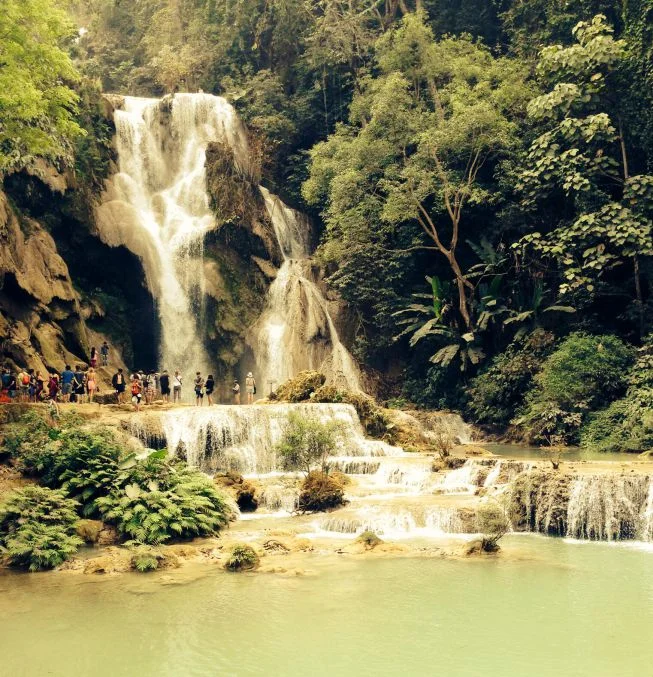
From Luang Prabang you can catch a flight to your next Southeast Asian destination or take a bus or minivan headed south to Vang Vieng for a day of outdoor adventure in this backpacker dominated riverside town before continuing on to Vientiane. If you make it as far south as Vientiane I highly recommend visiting the Cope Center to learn about the history of land mines in Laos.
Laos is an incredible country with diverse people, delicious food, and beautiful landscapes to discover. Whether you are looking for adventure or just want to be pampered, Laos has something for everyone. Before you visit be sure to learn a bit about the nation's history and issues facing contemporary Laos people.